
RAIR Rack, Cleaning and Filter Change
Last Review Date: March 19, 2021
I. Purpose
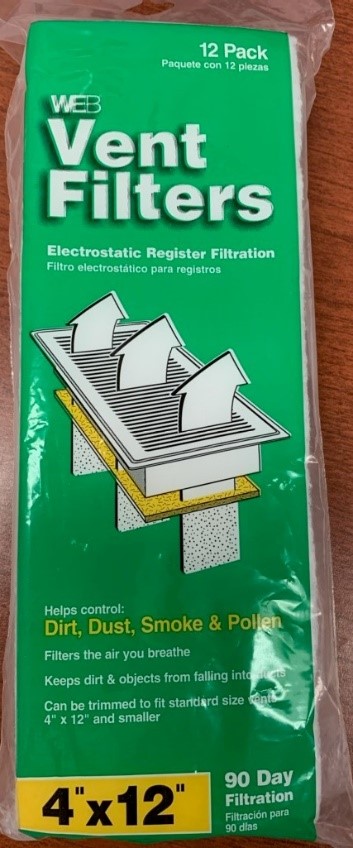
Washing RAIR Enviro-Gard Ventilated Racks is necessary to sanitize all surfaces inside and out in order to eliminate microorganisms that may endanger the health of an animal. Changing the pre-filters monthly on the supply and exhaust units according to the preparations manual will prolong the life of the HEPA filters. HEPA filters are certified yearly by Asepsis (Dave Lynch).
II. Responsibility
It is the responsibility of the LAR staff to ensure all RAIR racks are washed in the cage washer on an annual basis. All filters should be changed on a monthly basis and documented on the room logs located in HSB005, SB061, and SB066. Although all LAR staff are trained to perform these tasks, it may be necessary to consult the equipment manual when troubleshooting an issue.
III. Procedure for Washing
A. Transfer all animal cages to another rack, and keep cages in the same order as they
were on the home rack. Remove any empty cages being stored on the rack and send
them to the dirty cage washroom to be cleaned.
B. Shut off the RAIR rack by pressing the on/off button on the control unit of the rack that
is to be washed and unplug it from the electrical outlet using a ladder. SB061 and
SB066 have ladders or step ladders located in each room. The ladder for HSB005 is
stored in the HSB dirty cage wash room.
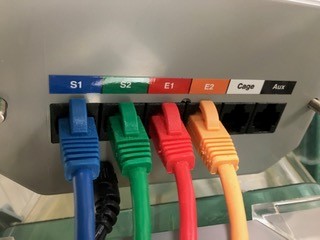
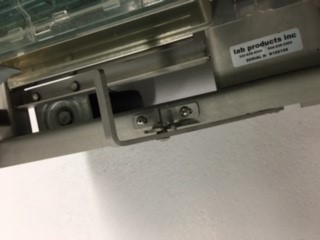
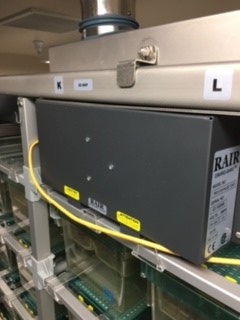
C. Carefully disconnect all the wires from the back of the Control Unit located in the
middle of the rack at the top on the supply side of the rack and remove it from the
rack by taking off the wing nuts that hold it in place. Then disconnect the other end of
the wires from Supply 1(S1), Supply 2(S2), Exhaust 1(E1), and Exhaust 2(E2), carefully
placing them on a dry cart.
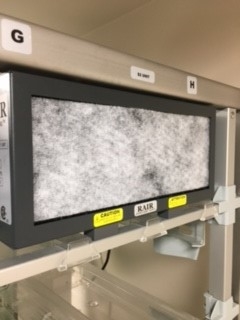
D. Remove the Air Supply and Exhaust Units located on the top of the rack, S1, S2, E1, and
E2 place them on the cart with the wires.
E. Remove the plenum covers of the supply and exhaust on the top of the rack.
F. Carefully take to the dirty cage washroom and place in the cage washer.
G. Note: Make sure the following are all removed before running the rack through a
cage washer.
1. Power supply and adapter
2. All electrical cables
3. RAIR Enviro-Guard air supply and exhaust units
4. Control Panel
G. When the rack has been washed, take it back to the room and leave it overnight to
dry completely.
H. The following day if the rack appears to be dry, close the lever to the bottom of the air
supply channels and tighten the nut to hold closed. Put all the metal covers, motors,
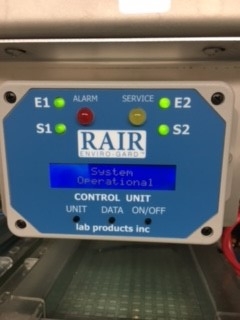
and wiring back on the rack. Plug in the rack and turn on, it will run a self-diagnostics
and when completed the Control Panel screen should read 'System Operational.'
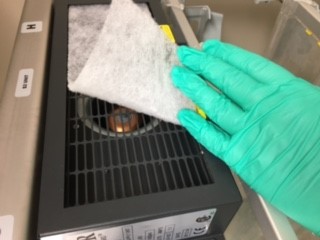
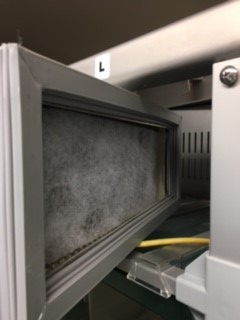
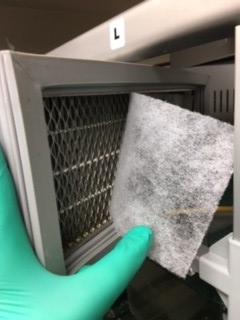
IV. Procedure for Changing Pre-Filters
A. Pre-filters are changed on the first of the month, or if the first falls on a weekend then
on the Monday following the first of the month. Once the filters have been changed,
make a note on the daily room log that the filters were changed and initial the log.
All LAR staff are trained on changing pre-filters on the RAIR racks.
V. Safety Considerations
A. Wear gloves and a lab coat while working on the racks
B. Be cautious of ceiling lights when working on a ladder