
U-APPROVE ACCESS
The following link will allow campus users to access the application U-Approve.
The link to U-Approve may be found on My UM - Employee under Staff Resources -> UApprove and under the letter "U" on the "A to Z" index under "U-Approve".
HELP CONTACT
Please review the help guide below for information concerning the functionality and use of U-Approve. If you cannot find a answer to your question, please contact uapprove@mso.umt.edu.
THE MAIN DASHBOARD/HOME PAGE
The following is a general functionality instructional guide for the U-Approve application.MAIN MENU

Mouse over the "Forms" and "Search" menu options to expand each category and view the departments and forms available in U-Approve.
SUBMISSION STATUS MENU
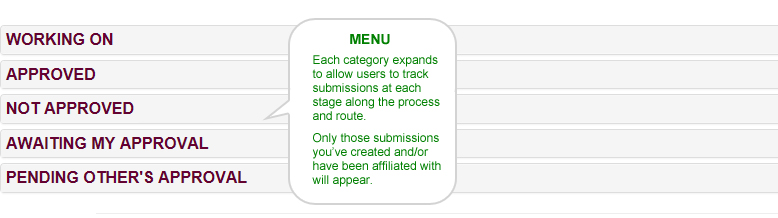
Click any category in the menu to view/track any submission you've created or been affiliated with throughout the stages of the process. Menu categories will display the total number of submissions comprised of all form types.
SUBMISSION STATUS ON-FORM

Once you’ve selected and entered a submission from the menu categories, the “STATUS” indicator reminds users at what stage of the process the submission currently resides.
SYSTEM FUNCTIONALITY
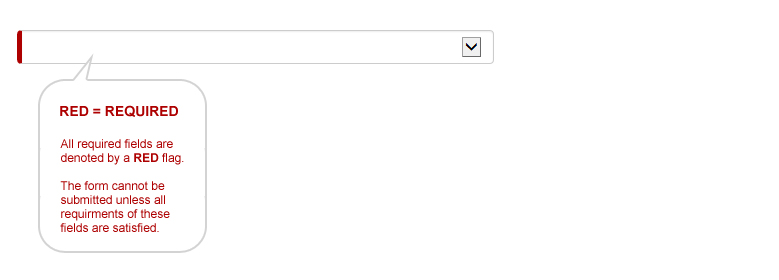
Red flags within a given field indicate that the information is required.
BUTTONS
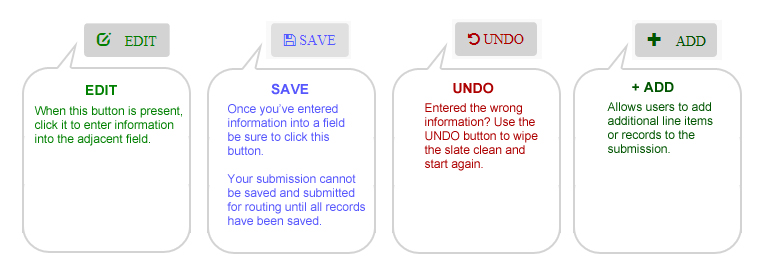
- Edit: Click this button and activate the field(s) adjacent to it in order to enter information.
- Save: After entering information into a record you must click, "Save".
- Undo: If you've entered the wrong information for a given record, use this button to start again.
- Add: Allows users to create additional line items or add records to a submission.
ADDITIONAL ACTIONS
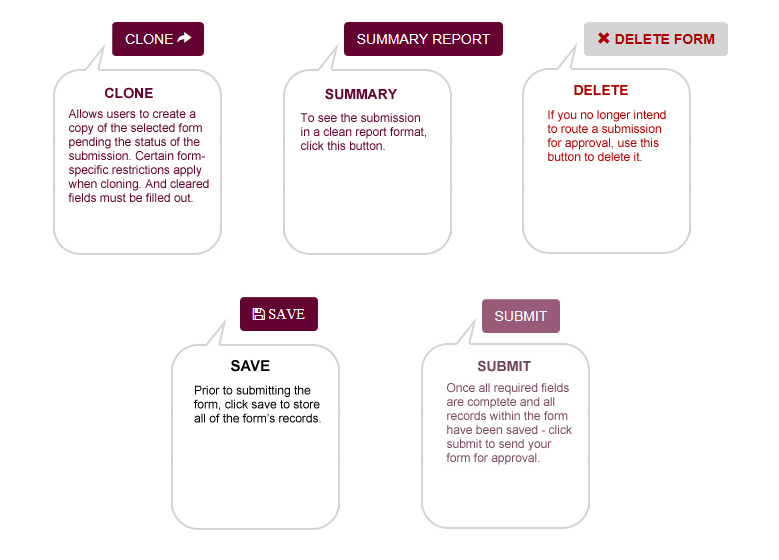
- Clone Form: create a copy of the selected form pending the status of the submission.
- Summary View: To see the submission in a clean report format, click this button.
- Delete Form: If you no longer intend to route a submission for approval, use this button to delete it.
- Submit: Once all required fields and records within the form have been saved - click submit to send your form for approval.
ATTACHING FILES
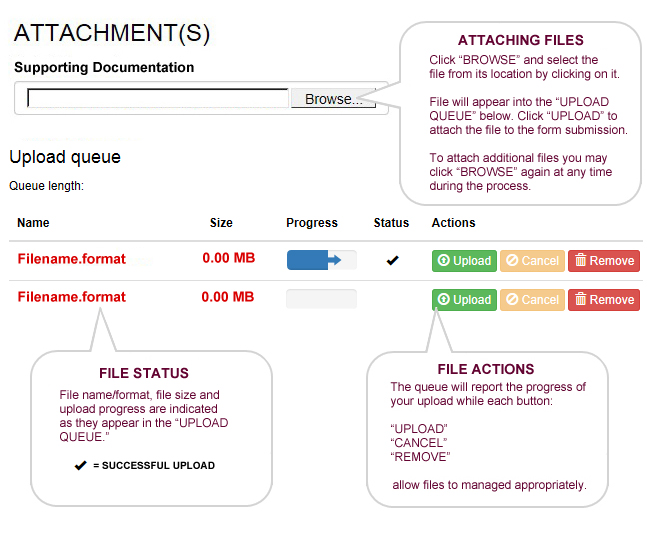
- Click “BROWSE” and select the file from its location by clicking on it.
- File will appear into the “UPLOAD QUEUE” below. Click “UPLOAD” to attach the file to the form submission.
- To attach additional files you may click “BROWSE” again at any time during the process.
File name/format, file size and upload progress are indicated as they appear in the “UPLOAD QUEUE.”
- A "CHECK MARK" indicates a successful file upload and attachment.
The queue will report the progress of your upload while each button allow files to managed appropriately:
- “UPLOAD”
- “CANCEL”
- “REMOVE”