
FAQs
-
It can take up to two minutes for changes to appear on your live site after the publishing process has finished.
Another reason that a published page might appear to not be updating is that your browser is caching the older version. You can resolve this issue by opening your site in a private or incognito.
To open a private or incognito window:
- Safari - command⌘+shift+n(Mac)/control+shift+n(PC)
- Google Chrome - command⌘+shift+n(Mac)/control+shift+n(PC)
- Mozilla Firefox-command⌘+shift+p(Mac)/control+shift+p(PC)
- Opera-command⌘+shift+n(Mac)/control+shift+n(PC)
Examples of private browsers:
Chrome
Safari
Firefox
Opera
-
In the URL (address bar) replace 'www' with staging. Example: https://www.umt.edu/ becomes http://staging.umt.edu/.
However, if your site is on a subdomain, most likely you will need to replace the subdomain with 'staging.' If this does not direct you to your staging site, please contact WTS at webhelp@mso.umt.edu for confirmation of your staging URL.
-
- Select the folder from the asset tree that you will be reordering.
- The folder asset list appears in the workspace.
- Reorder the assets by clicking the Order column until it displays in ascending order.
- Select an asset and use the Move to Top, Move Up, Move Down or Move to Bottom arrow icons above the list. You can also click and drag assets to move them up or down in the list.
- Publish the parent folder after reordering has been completed.
Tip: If folders or pages aren't visible in the navigation after reordering, they may be set to be excluded in navigation.
-
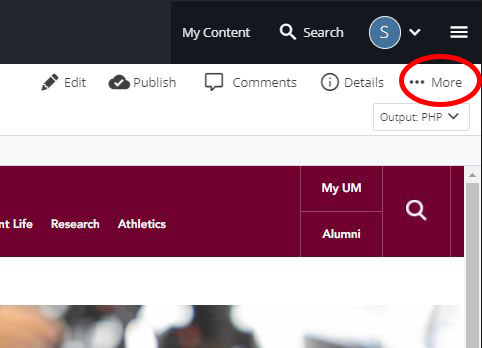
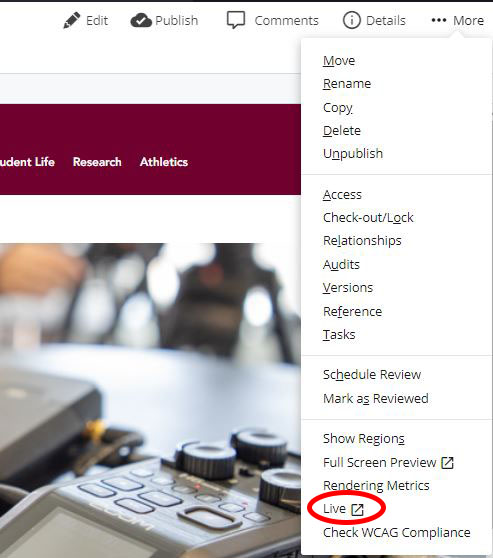
Once the site is published, go to the page you want to view in Cascade. Click on "More" then navigate to the "live" button.
-
- Page Title is used as the Heading 1 and browser tab title. Cap all major words, which means anything longer than three letters, all proper nouns and the final word of the headline – even if it is less than four letters long.
- Display name is used in the navigation. Cap all major words, which means anything longer than three letters, all proper nouns or the final word of the headline – even if it is less than four letters long.
- The Page Name, along with the placement folder(s) name is what makes up that part of the URL of an asset. New page names should be all lowercase with no spaces. Use hyphens to separate words to ensure that you don't see %20 in your URLs when the asset renders in a browser.
- Example: https://www.umt.edu/cascade-support/site-migration/default.php
-
An asset is any entity within the system that can be used to generate content. Content editors use the following assets:
- Page
- Folder
- File ( JPG, pdf, docs..etc.)
- External Link
-
- Each page should consist of only one H1 heading.
- Headers in Cascade should all follow the same pattern.
- The main header should be H1. This is automatically added and is taken from the title of your page.
- The next level of headers should be H2, and if there are subheaders to those headers they should be H3. Follow this pattern down to H6.
- Headings rarely go past H4 unless there is a large amount of data being displayed. If you find yourself using H5 or H6, consider breaking up your content into multiple pages.
-
- Select the parent folder in the Asset Tree where the folder will be created.
- Click Add Content > Folder in the Top Menu bar.
- Complete the following fields:
- Folder Name displays the assigned name for the folder in the asset tree and in the published URL.
- Placement Folder displays the folder where the folder is being added. Click on Folder to change.
- Include in Navigation? is used to display or hide the page in the navigation (this is checked 'yes' by default).
- Click Submit.
For more info on folders check out our folders section.
-
- Select the folder in the Asset Tree where the page will be created.
- Click Add Content > Unit Page in the Top Menu bar.
- Complete the required following fields:
- Page Name displays the assigned name for the page in the Asset Tree and in the live URL.
- Placement Folder displays the folder where the page is being added. Click on Folder to change.
- Display Name is used in the site navigation.
- Title is used by web browsers and search engines to identify the page. It is also used as the heading level 1 of the page.
For more info on creating a page check out create a page.
-
Click the green plus icon located in the right-hand corner of a row to create a new row.
Click the green plus icon located in the right-hand corner of a column to create a new.
-
Click on the Up or Down arrows at the top of each row or column to rearrange the order.
-
- To insert an image into a column, you will use the WYSIWYG editor. Select Insert > Image. You can also click on the Insert/edit image icon in the toolbar of the WYSIWYG editor.
- In the Insert/edit image window that pops up, Choose whether you want to insert an internal image (one that you have uploaded to Cascade) or an external image. If you want to link to an internal image, navigate to the image in Cascade by clicking in the Image Source field. If you are linking to an external image, paste the URL of that image into the Image Source field.
- If the image is decorative, check the Decorative checkbox.
- If the image is not decorative, fill in a short description of the image in the image description field. Please note this is legally required for accessibility purposes for all images in Cascade.
- Use the Dimensions field to alter the dimensions of the image, though we do recommend altering the dimensions of any image before inserting into Cascade as this will ensure that the image displays at the size and quality you want it to.
- You can set the Class field to pull-left or pull-right if you want to align the image to the left or right of the row or column.
See our images section for more specifics on images and alt
-
- To create a block, select the "Add Content" button located in the upper left-hand corner of the Cascade.
- Select "Blocks Pre-built modules" from the list.
- Choose between "Column Blocks," "Row Blocks" or "Structured Blocks."
- You can save your blocks anywhere.
- Submit Your changes and you should see your block appear in the folder you have chosen.
For more info on creating a block check out our blocks section.
-
Any asset from the asset tree can be deleted. Cascade will confirm that you want to delete the asset.
-
Select the asset to be deleted from the asset tree.
-
Click … More > Delete in the action toolbar or right click Asset > Delete.
-
If the asset is linked to another page, Cascade will display a warning. Be sure to update the linked page as needed.
-
Make sure Advanced Unpublished Settings > Unpublished from specific destinations is unchecked.
-
Click Delete.
-
-
- Select the asset to be published (page, folder, file).
- Click Publish in the top right of the workspace, or right-click on the asset in the asset tree and select Publish.
- Available publishing destinations will be listed. If they don't display, click View Publish Settings.
- Check or uncheck destinations. Only checked destinations will publish.
- Click Publish.
For more info on publishing check out our publishing section.
-
Assets contained in the Trash can be restored to their original location for a limited time before they are permanently deleted from Cascade.
-
Click on the Trash link at the top of the asset tree.
-
Identify the asset that will be restored in the Trash listing. You can sort by date deleted or hover over the asset name to see the original location of the asset.
-
Select the Checkbox next to the asset to be restored.
-
Click the Restore icon that appears at the top of the list.
- A notification will display that the asset has been successfully restored.
-
-
Blocks are attached to a page by editing the page and adding it to a row if it is a "row block" or adding it as "above content"/"below content" if it is being added to a column.
For a Column Block:
- Select the Row that contains the Column you want to attach the block to.
- Set the Row Content Type to On-Page Content.
- Select the Column you want to attach the block to.
- Depending on the type of Column Block you are attaching, you will either set the Column Content to WYSIWYG or Block.
- If you have created a Button Group, set Column Content to WYSIWYG. Then click Column Options and attach the block either to the Above Content Block attachment point or the Below Content Block attachment point.
- If you have created a Block of the 'Replace Content' type, set Column Content to Block. Then, click in the Block field and navigate to and select the Block you just created.
For a Row Block:
- Select or create the Row you want to attach the Block to.
- Set the Row Content Type to Row Block.
- Click the Choose Block button in the Block field and navigate to and select the desired Block.
- Click the blue Choose button in the top right.
-
You can view the progress of a publishing page by going to the hamburger menu icon (3 horizontal bars) in the top right hand corner of the screen and clicking on Publish Queue.