
Edit Your Pages
This section covers the basics of how to access and edit an existing page, best practices for editing and how to save your changes.
More detailed documentation about creating and editing content on your site can be found in our Building Your Site documentation.
Select A Page
Navigate to the page you want to edit by selecting it in the asset tree or by navigating to the page through the workspace. The workspace provides a preview of your site and is structured by the asset tree.
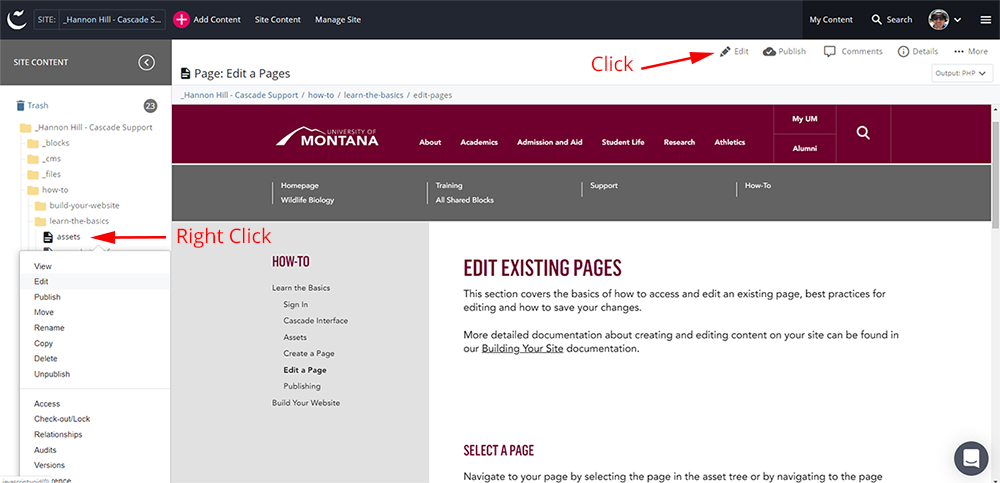
Open the Editing Window
There are 2 ways to open the editing window.
- Click 'Edit' (or the pencil icon next to it) in the top bar of the Cascade Workspace.
- Right click the name of the page in the asset tree and select 'Edit' from the dropdown menu.
Rows
Pages are divided into rows. Content is added to a page by using rows in 2 ways.
- WYSIWYG: This stands for 'What You See Is What You Get,' which means that what you see in the editing window will be (mostly) what you will see on the published site. You can add and edit things like text, images and tables in the WYSIWYG editor. The interface is similar to a word processing program like Microsoft Word. Please see the WYSIWYG Editor page for detailed instructions.
- Block: Blocks display content in a structured, attractive way. Users can use one of the many pre-formatted blocks created by the Web Technology Services team. Please see the Blocks page for a list of links to each block and detailed instructions on how to create them and add them to your page.
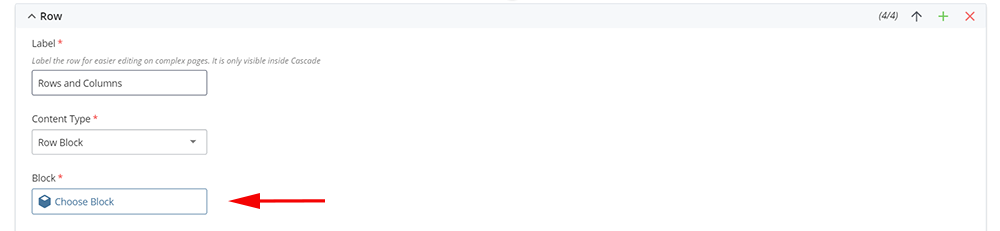
Row:
- First select whether you want to edit WYSIWYG content, or Block content by selecting either Content Editor or Row Block in the Content Type dropdown menu.
- If you choose Row Block, you can then attach the desired block to that row.
Adding, deleting and reordering Rows and Columns

To add a new row, click on the green + icon located at the top right of the row above where you want to add the new row.
To delete a row, click on the red x icon located at the top right of the row you want to delete.
To reorder a row, click on the up or down arrow at the top right of the row.
Save and Submit Content
- After completing changes, click the blue Preview Draft button located in the upper right of the editing window.
- A draft with the complete changes will display. Review changes, add any comments and click Submit or Check Content & Submit.
- If you clicked Check Content & Submit, review content changes, click the checkmark icon.
- Your changes are now submitted and ready to be published.