
Navigate should not be used as a reporting tool. The data is intended to inform operations but should not be used in lieu of other formal reports vetted by the UM Data Office.
Keeping track of your advisees can be overwhelming when it comes to providing support to those who need it most. Navigate can help you prioritize, keep track of your efforts, and coordinate with instructors and other staff members on campus.
Getting Started Resources
These quick self-paced lessons get right to the essentials of what you need to do to get going.
- Getting started with Navigate
- Setting up availability
- Appointment campaigns
- Appointment summaries
- More to come!
To try out the features, you can use the training site.
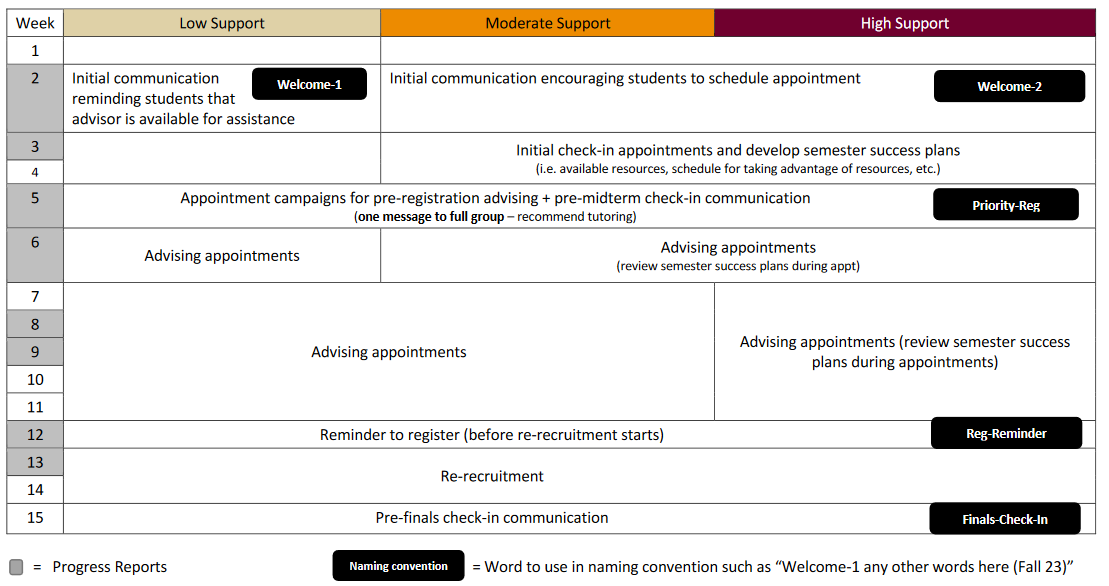
UM Advisors Communication and Support Plan
- UM Advisors Communication and Support Plan: Schedule, campaign guidance, and sample emails
- How to Create and Use Student Support Lists: Using the predictive model support levels to generate your support list. Guidance on reviewing and adjusting those lists and then uploading as Navigate Student Lists to use in campaigns.
- Instructions for Viewing and Managing Cases in Navigate: "In Danger of Failing" alerts are assigned to primary advisors as cases. This document outlines how to manage cases including closing them at the end of the semester.
- Instructions for Advisors on Pulling Early Alert Reports: Quick instructions on how to use Navigate reporting to generate a list of your students with alerts.
Tutorials
-
Following is to find out how many appointments you have had:
- Select "Reporting" option from the left navigation menu.
- Select "Appointments" report.
- Enter range of dates you want to review.
- Under "Organizer for Appointment:" select yourself.
- Make any additional selections as needed for the other fields (Care Units, Filter by Location, etc.)
- Note the checkboxes and select as needed.
- Click "Search".
- If you had a meeting with a student, you will have been the organizer. If you had more than 100 meetings, you can click the "Select All" box to the left of the "STUDENT NAME" column. Then, click the option to "Select all ___ items."
- Click the "Actions" menu and select "Export Results"
- Pick and choose which columns you would like to export.
- Reports will be saved in the Download Center for Reports which is available from the home page.
- On the right side of the home page, the Download Center is under "Quick Links". They will be available for 30 days.
- Click the .csv file to download.
- Deleting the two headers (first two rows) will allow for easier filtering.
- Filtering can be done by selecting all (ctrl + a), go to the Data menu, turn on the "Filter" option, and go to the View menu. From there, you can click "Freeze Panes" and select "Freese Top Row".
- This will make it so you can see your column headers no matter how far down you scroll.
-
Alert reasons and actions Alert Reason
Include in Progress Reports?
Ad-Hoc Alert Reason?
Should assigned Advisor receive an email?
Should student receive an email?
Should Alert Reason initiate a Case?
Who specifically should be assigned the Case?
In Danger of Failing
Yes
Yes
Yes
Yes
Yes
Assigned primary advisor
Advisor or Case Assignee next steps
Primary advisor connects with student to discuss concern, refer student to relevant resources, and guide student through course change transactions as appropriate. Advisor encourages student to contact instructor during office hours to discuss situation.
Case can be closed after advisor successfully connects with student to discuss situation or after three attempts to contact student. Upon closing the Case, advisor chooses a relevant Case Outcome and adds comments to provide context to closing the Case.
Note: Advisors are encouraged to create Student Lists in Navigate to track students on their caseload that have outstanding Alerts and/or Cases. This makes it easy for advisors to launch appointment campaigns and track outcomes for relevant students.
-
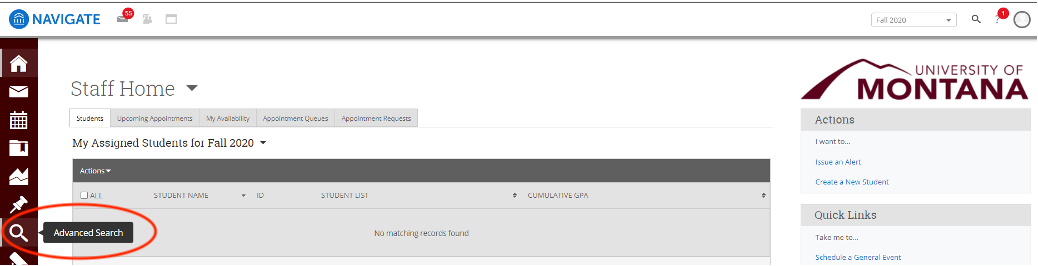
- Login to Navigate (umt.campus.eab.com; enter Net ID and PW)
- Click icon for Advanced Search in the navigation column on the left side of home screen:
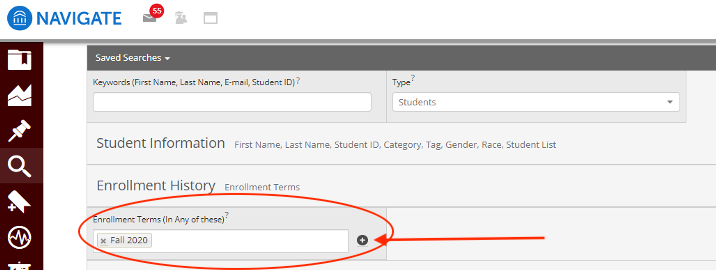
- Once on the Advanced Search page, click “Enrollment History” drop down, and select “Fall 2020” in the “Enrollment Terms (In Any of these)?” text field, then click the “+” sign next to the “Enrollment Terms (In Any of these)?” text field as shown below:
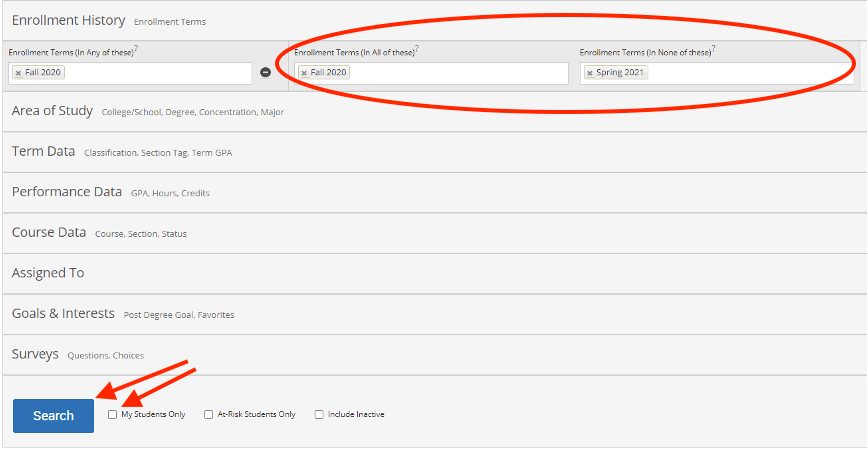
- Select “Fall 2020” in the “Enrollment Terms (In All of these)?” text field and select “Spring 2021” in the “Enrollment Terms (In None of these)?” text field, check the “My Students Only” box, and then click the “Search” button at the bottom as shown below. A listing of your assigned students sorted alphabetically by student last name will appear. You can then click each student’s name to access their profile page.
-
It will be important for all advisors to use the Appointment Campaign feature within Navigate to invite their assigned students to schedule advising appointments. Detailed instructions on how to create an Appointment Campaign in Navigate are available on p. 15 of the training guide.
-
There are two ways you can make yourself show up as an organizer. One is to check the box on the top right to include your appointment availabilities. The other is to go back to your availabilities and add “Campaign” availability. That edit should show up in the highlighted area next to your name in the screenshot below.
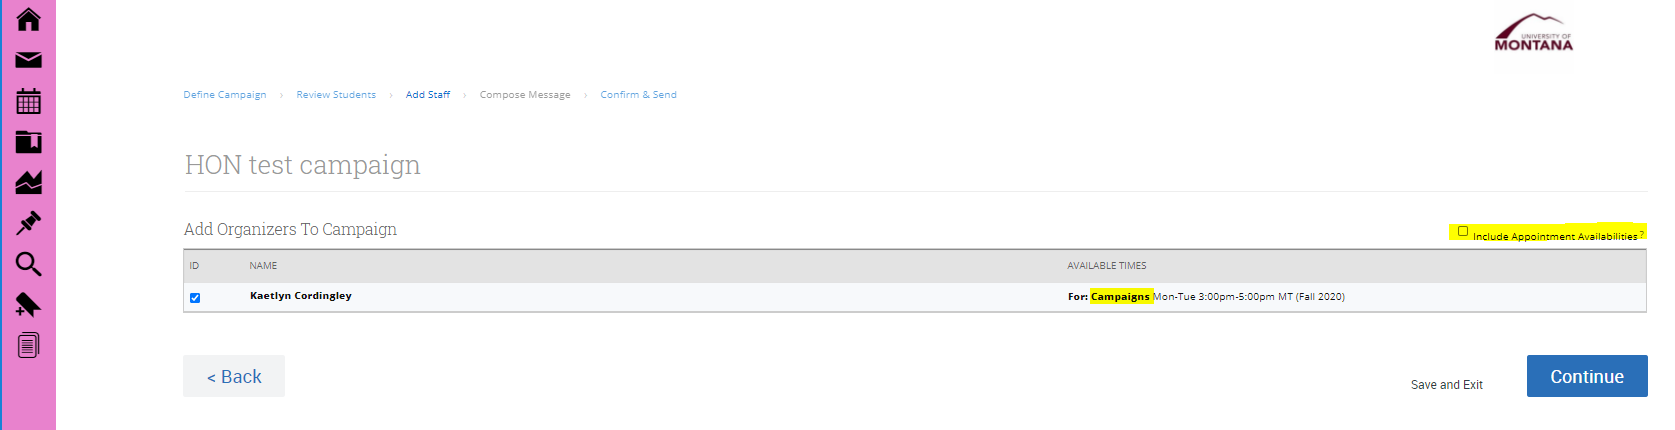
To enable campaign availability for yourself, please go the “Availabilities” tab on your staff home page in Navigate, click the “Add Time” option from the Action dropdown, and then click the “Campaigns” button.
#BBD0E0 »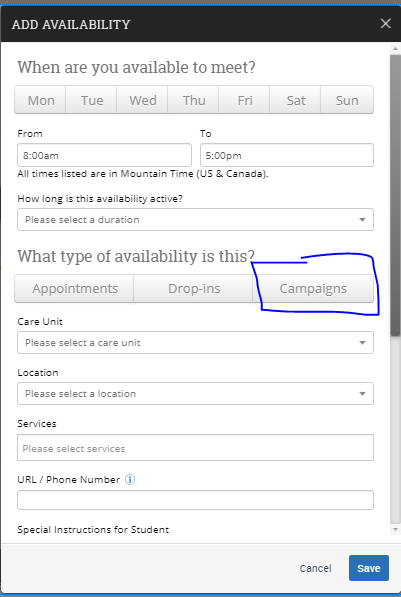
-
All advisors are expected to complete Appointment Summary Reports in Navigate for all advising appointments. Detailed guidance on completing Appointment Summary Reports is available on p. 11 of the training guide.
-
Please view our step-by-step tutorial.
-
Please view our step-by-step tutorial.
-
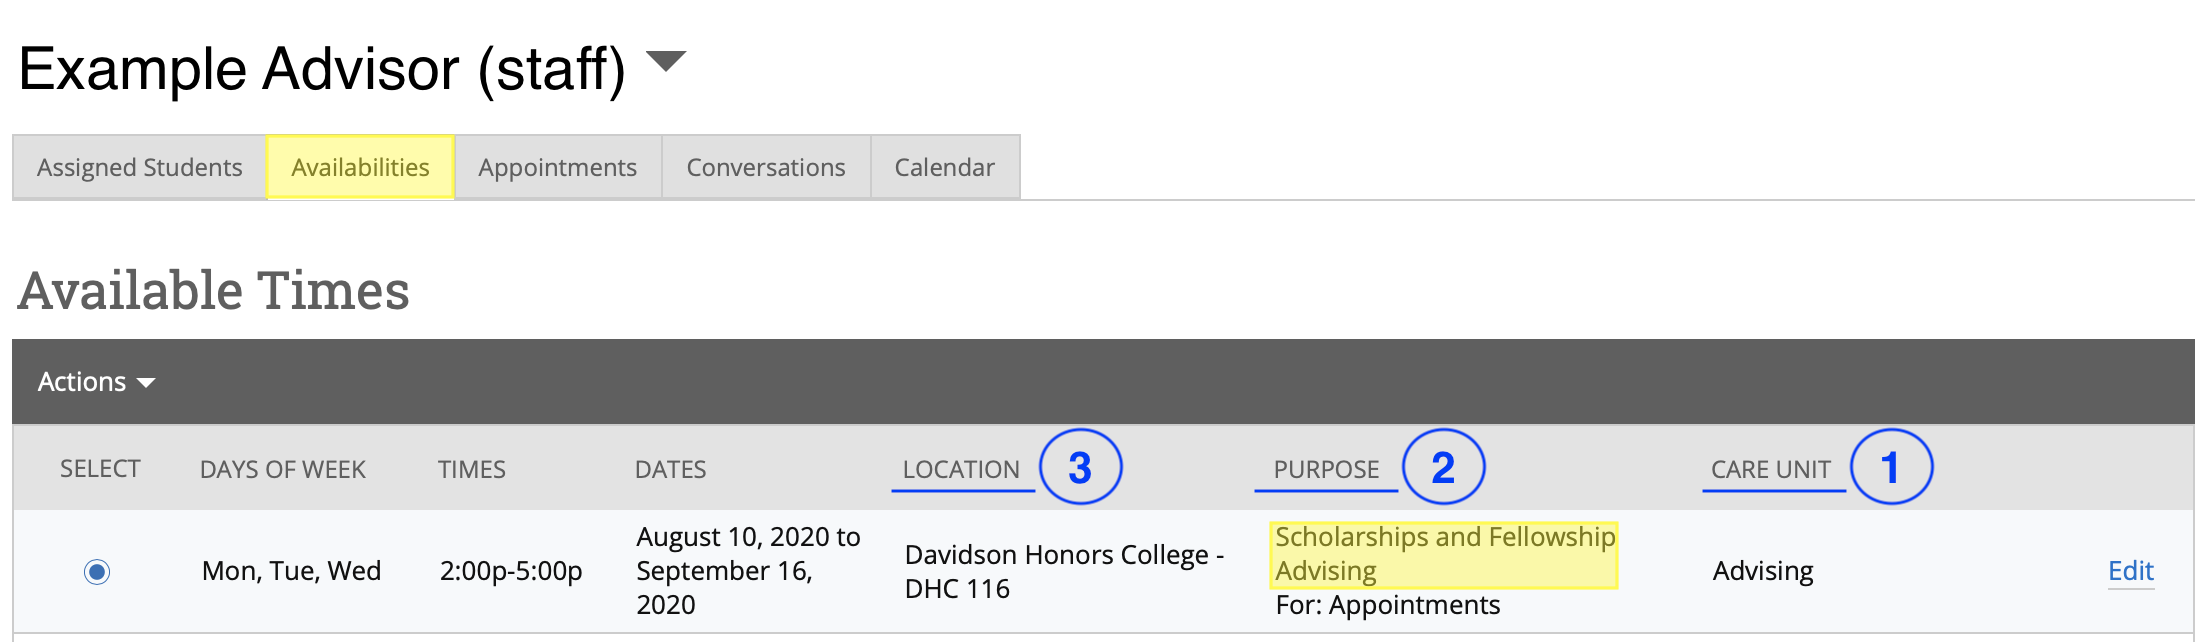
If you wish to provide instructions to students about how to initiate an appointment with you – which is separate from the Appointment Campaign instructions provided above – your own availabilities tab will provide the relevant details. Using the screen shot below as an example, this advisor would tell a student to click through the scheduling work flow as follows:
- First choose a care unit (“Advising” in this case)
- then a purpose for the appointment (“Scholarships and Fellowship Advising” in this case)
- and then a meeting location (“Davidson Honors College – DHC 116”)
At this point the workflow will give the student the ability to choose from a list of staff, and should be able to select your name so long as you have availability. In many cases, there is a restriction in place that a student must be assigned to the advisor in a formal capacity, so if the student does not show up in your list of assigned students, this restriction may prevent a student from scheduling with you. You can certainly schedule with the student by looking them up in Navigate and then choosing the schedule an appointment option from the menu on the right.
If students who are assigned to you encounter problems when going through the scheduling workflow, please have them provide as much information as they can about the three bullet points above, and forward the info to the OSS tech team for troubleshooting.
-
Please click the following link for the tutorial video.